I read an Instructable months earlier describing how an old laptop can be converted into a digital picture frame, and that sounded like the kind of idea that would hopefully spark the imaginations of my students. Conveniently enough, I had an old Sony Vaio tucked away in the basement that would serve the purpose nicely. I created the following Sliderocket presentation as the hook to my project. It introduced my example as well as outlined the process for the students' research projects.
It worked. The kids were engaged because they had control over the topic, and my laptop-turned-frame showed them the difference between a thought-provoking, analytical question and a shallow one.
The only problem is that I never got around to actually making the picture frame work. It is actually one of the few regrets I have for the year. I'm tough on the kids about completing work, so why should I be any more lenient on myself?
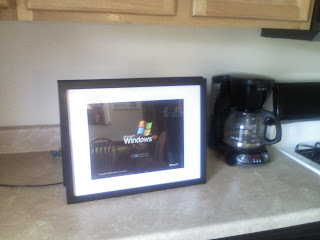
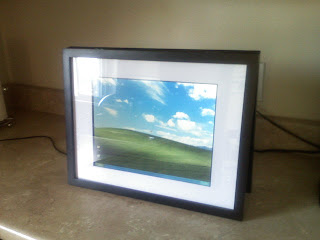
Well, I can check it off my summer to do list. Two and a half months late, but my digital picture frame is complete. The students I had last year in 7th grade will be the same group I have this coming September as 8th graders, so I look forward to having the frame loaded with last year's school pictures on the first day of school. Better late than never!
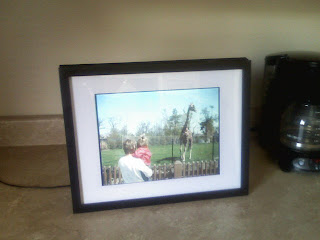
For anyone ambitious enough to make their own digital picture frame (and willing to risk trashing an extra laptop), here's my how-to.
Preparing the Operating System:
- My laptop originally shipped with Windows 98, but the software I needed to control the frame wouldn't run, so I wiped the hard drive and installed Windows XP.
- Rather than install a slide show program, I just used the Windows picture viewer slide show feature. I downloaded this script that allowed me to choose an appropriate length of time for each picture before progressing to the next.
- I configured the laptop's network settings so that I could share a folder for pictures. This way, I could add/remove pictures from another computer on my network.
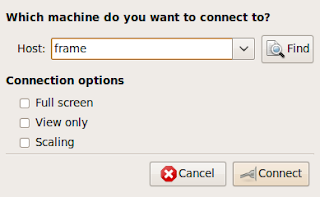
- Because I planned to remove the keyboard and mouse, I needed a way to control the screen and start the slide show. To do this, I used TightVNC, a free program that allows other computers to use a VNC client to connect remotely to the laptop picture frame. I added this program to the startup menu so that it would run as soon as the laptop connected to my wireless network.
- I restarted the laptop several times after performing these actions to make sure it would do what I expected it to. There would be nothing worse than taking it apart only to find I missed a simple step.
Preparing the Machine:
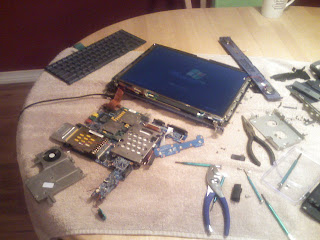
- I started by removing every screw I could find from the case.
- The first part to open up was the top of the laptop. I disconnected the pins that held the keyboard into place and this uncovered everything else. It was fairly easy to identify the components, or at least the ones I was certain I wouldn't be needing.
- After disconnecting the keyboard, I plugged the laptop in and restarted it. I wanted to make sure it wouldn't do anything funny when I started unplugging hardware. It fired up and shut down without incident, so I continued pulling pieces off.
- I only ran into trouble once. After removing the CD drive, touch pad, and LCD casing, I plugged it in to find that it was no longer receiving power. After half convincing myself that I did everything right and that the power supply had somehow shorted out, I retraced my steps by replugging in each device. Apparently the tiny backup battery connected to the internal touch pad component is essential to the laptop's power supply. Problem fixed.
- After removing all the unneeded plastic casing and extra hardware, I was left with an LCD screen connected to a motherboard consisting of a wireless card, hard drive, CPU and fan, RAM, and power button.
Assembling the Digital Picture Frame:
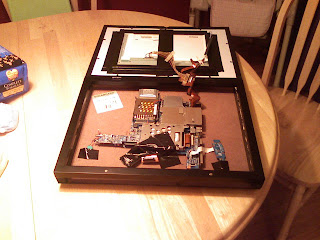
- 1.My LCD was 9”x12” so I needed to find a frame to fit it. Rather than go to a craft store and get a frame specially ordered, I decided to try my luck at Target. I found this frame that was well-fitted for the project because it was hinged to allow for easy access to the laptop components I was planning on hiding behind the screen.
- I attached the LCD to the matting with heavy duty duct tape. It's the down-and-dirty approach, but so far it seems to be working.
- After measuring, I realized that the frame would not be deep enough to house the screen and the laptop guts. I pulled off the cardboard backing and cut two pieces of MDF board to fit either side of the frame. After spray painting and attaching these with finishing nails, the frame was now about 1/2” deeper and, because I didn't cut borders for the top or bottom, I now had better air flow through the frame to prevent the laptop from overheating.
- I cut a piece of 1/8” backer board to be used for mounting the hardware. A few of the pieces did not have pre-drilled holes, so I taped them down. Then, I nailed it to the back of the frame.
From start to finish my digital picture frame only cost $40. Considering sites like Amazon are selling digital frames half the size for twice as much, I figure the little bit of construction time was well worth it!
Save to delicious Saved by
0 users


2 Responses:
That's sick! I love the point about accountability to yourself as you would ask of your students...how easily we lose sight of this. Your students are lucky to have you!
One question....
When is the "video" version of this Hack coming. :)
Wow! That is such a cool project. You now have a DIY digital frame that can also stream video, display web content, etc.
What types of projects were your students inspired to create?
Post a Comment