Showing posts with label Flip camera. Show all posts

Wednesday, May 26, 2010

Taking a Technology Approach to Vocabulary

Several years ago, I taught the historical fiction book My Brother Sam is Dead. I did the obligatory vocab chart, and while the kids did well with the quiz, it was clear that they would probably never use those words again once the quiz was passed forward. But after the bell, I watched one of my boys, in a middle school attempt at flirting, knock a book out of a girl’s hand. As he sped past me with his crush in hot pursuit, he called to her “Have clemency on me!”

That was one of our vocab words, and this boy had taken it out of class and inserted it into his vocabulary. Pedagogically, vocabulary should be looked at as a skill and not content.

I used this example from 2005 to illustrate vocabulary ownership simply because I can’t think of a more recent example of this actually happening. I don’t think I’m an incompetent teacher; it’s just that there is no magic bullet for teaching vocabulary.

I have never been satisfied with students looking up definitions for unit-specific vocab words and then spitting those definitions back at me on a quiz. I’ve tried visual vocab techniques, word walls, sentence writing, etc, but nothing ever seems to embed those words into the students’ lexicon. That’s what I want – ownership of those words.

Last Friday during a required planning day for my department, I came up with a quick-and-dirty project for my students. The state science assessment is just over the horizon, so to help my team, I decided to have them review science terms.

Each student was randomly given two vocab words. They had to define these and then provide one supplemental bit of information – either a sentence in context, an example, or a description. So far, this was a typical vocabulary assignment, but the real excitement came in the form of the assessment.

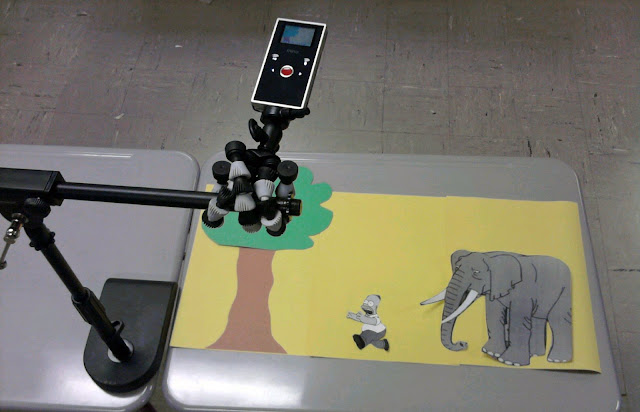
Rather than a quiz, students were allowed to choose a location somewhere on the school campus to film a visual dictionary entry using my Mino Flip video camera. These were then uploaded to our team website so students could use them for review.

The results were intriguing. It was the first time I have ever seen students take an interest in vocabulary. Even more so, students could easily recall definitions because they now had an experience to pair them with. My team’s dictionary has 183 definitions, and while I doubt every student’s working vocabulary is now 180+ words richer, this was undoubtedly a better approach to vocabulary than rote memorizing.

I think I may try this with vocabulary next year and keep a running dictionary with my students. I was rushed to get my students ready to record almost 200 video clips and in some videos it shows. In the future I would push the kids to memorize their “script” rather than rely on a note card. Regardless, a Video Dictionary has some serious potential.

If you’d like to take a peek at our Video Dictionary, click here.


Save to delicious Saved by 0 users
Digg Technorati StumbleUpon Reddit BlinkList Furl Mixx Facebook Google Bookmark Yahoo
ma.gnolia squidoo newsvine live netscape tailrank mister-wong blogmarks slashdot spurl

Monday, May 10, 2010

How to Make Stop Motion Movies in 4 Easy Steps

Despite stop motion video reaching its peak in the long-forgotten era of Gumby and Davey and Goliath, it is a film technique that is simple and powerful. It is very cheap to produce and requires creativity and problem solving skills – all excellent reasons to use it in class with students!

For my stop motion video, I used my Flip Mino, but really any camera capable of taking videos will do the trick. Here is how to make a stop motion video in four easy steps.


Step 1 – Set the “Stage”

Before filming, decide how the stage will appear. Choose props, characters, word bubbles (if needed), and background scenery for your movie. For my sample above, I used magnets on a dry erase board. I mounted my camera parallel to the board. The below example shows another possible method for setting the stage. I used a desktop microphone stand and a flex grip camera mount to position the Flip directly over the scene. Choose whichever method is going to make filming your scene easiest.


Step 2 – Record your Scene

Back in the early days of stop motion, every frame was photographed individually. This was laborious and often riddled with mistakes – the slightest bump of the camera would create a major discrepancy in the final movie. Today, thanks to digital video, there is an easier way. Instead of taking digital pictures frame by frame, simply press record on your video camera. Now move your characters every so slightly and then remove your hand from the shot. Wait a second and repeat. Pay attention to your shadow – you don’t want it inadvertently finding its way into your finished film!

Step 3 – Create Snapshots from the Raw Footage

Once you have inched your way through the scene, it’s time to create snapshots. This can be done with any video editor, but I found it especially easy using Windows Movie Maker. Simply import the video into the timeline and press play. Stop at any point where you want to create a snapshot, then choose “take picture from preview” from the tools menu. I saved my pictures in sequential order to make it easier to import later. The raw footage for my dinosaur sample was almost 8 minutes long, but after omitting shots I didn’t want I was able to condense it down into about 60 snapshots.


Step 4 – Import Snapshots

After you have your snapshots, you can delete the raw footage from the timeline. Before importing the snapshots, you will have to determine how long you wish each one to display for. Go to options in the tools menu and change the duration to .25 seconds (feel free to experiment with the length of time). Now you can select all of your snapshots and drag them into the Movie Maker project. If there are frames that you want displayed longer than others, you can manually change the length by clicking on the outer edge of the snapshot and dragging it to the desired length. When your stop motion video is complete, save as a movie just like you would any other Windows Movie Maker project!


Save to delicious Saved by 0 users
Digg Technorati StumbleUpon Reddit BlinkList Furl Mixx Facebook Google Bookmark Yahoo
ma.gnolia squidoo newsvine live netscape tailrank mister-wong blogmarks slashdot spurl

Wednesday, October 28, 2009

Modeling How to Use the Flip Camera with Students

Every day, my team begins our daily meeting by entering homework into the team calendar on our school website. It's a nice way to communicate to parents, and also serves as a way to hold kids accountable when they are absent. Understandably so, it's not the most popular page on the website. Based on a quick poll in class, I'd guess less than a third of our kids frequent it more than once a week.

I'm trying to change that. For the past week, I've been taking the last 10 minutes of my silent reading group and filming skits with them that go along with the day's homework. It's giving me practice with my new Flip camera (yesterday's post explained how I got it), and since I upload the finished movie directly into the calendar, I'm assuming more kids are visiting it from home.

Right now the skits are more about the message than the process. I'm the one who writes up the dialogue, and the one who records and edits the video. But I'm hoping by modeling this process on a daily basis, students will soon be able to take over the task. Actually, that's already happening. Today, several students knocked on my door to ask if they could borrow the Flip for a Social Studies project.

Those kids probably aren't going to check the homework tonight, but I can guarantee they wouldn't have thought of adding a technology piece to their project if they hadn't seen how it was done first.

Here are our video skits for the last two days. I hope you enjoy!


Save to delicious Saved by 0 users
Digg Technorati StumbleUpon Reddit BlinkList Furl Mixx Facebook Google Bookmark Yahoo
ma.gnolia squidoo newsvine live netscape tailrank mister-wong blogmarks slashdot spurl

Tuesday, October 27, 2009

4 Ways Flip Cameras are Better than Digital Video Cameras


Last week I was chosen to be a participant in a 2-year study on using a Flip Mino video camera in the classroom. Admittedly, I know very little about the Flip but I've been using digital video cameras in my classroom for a long time, so I really didn't see the big deal.

Even though my Flip Mino has only been out the box for about a week, I've already noticed some definite advantages to using it versus a traditional digital video camera.


Portability
I'm fortunate to teach in a district that has a healthy technology budget, so digital video cameras have been accessible for years. When a teacher needs to sign one out, they head to a storage cabinet where each camera is stored in it's own insulated lunch sack. Although it's a more economic way of keeping things safe, you can't help feel like a bit of a dork walking down the hall with it. Look at the picture below. Think about taking one of those bags with you on a field trip. You're already holding your own lunch, the first aid kit, a stack of permission slips, student health alerts, and all the other things entrusted to a chaperone. Do you really want to carry a video camera in a lunch box too? The Flip's size is one of its biggest strengths. I could easily carry a dozen of them in one of those sacks (although I'd still feel like a dork).


Transfer
Like most media devices, the Flip camera comes with software to help edit and manage your work. The advantage, however, is that the software is loaded onto the camera and can quickly be installed onto any computer that it plugs in to. No more losing installation CDs minutes after opening the box. You need no accessories, adapters, firewire cables, or attachments. To upload, flip (hence the name) the usb connector out, and plug it in. Done. The Flip is like a portable, traveling movie studio.


Cost
The MSRP for the Flip Mino (which is what I have in my pocket right now) is under $150. The high definition version is under $200. Considering the fact that it was first released just over a year ago, and the effect of Moore's Law on things like this, imagine the capability/cost ratio in a few years.


Ease of Use
There's an on button. And a giant red record button. To give you an idea of how easy it is to use the Flip, here is a video my daughter took. She's two years old. If a two-year-old can do it, so can you.

Save to delicious Saved by 0 users
Digg Technorati StumbleUpon Reddit BlinkList Furl Mixx Facebook Google Bookmark Yahoo
ma.gnolia squidoo newsvine live netscape tailrank mister-wong blogmarks slashdot spurl